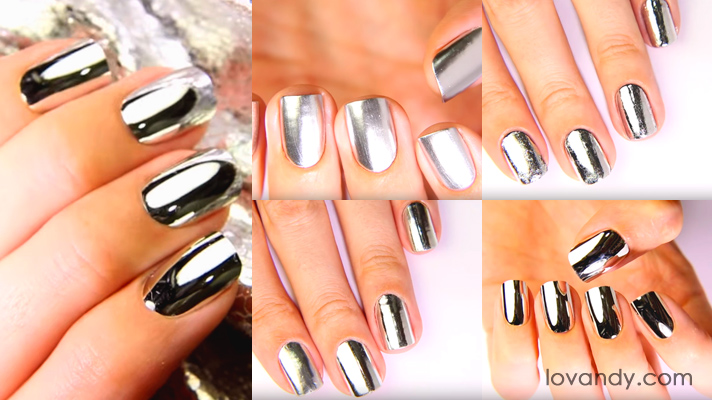
Have you ever wondered how to make metallic chrome nails? If yes, you are going to be happy with this article. Because today we will describe five different techniques.
As all of these techniques are rather unique, we will do a list of must-have things for each of them. However, there are some special things, required for almost every single way of making metallic nails at home. If you have ever read our tutorials, we bet you know this stuff. So, notice, that no matter what manicure you choose, you will need some acetone and cotton buds or swabs for corrections.
Basically, this is what we want. Depending on what metallic nails tutorial you will choose, the result may vary. However, each of them is special and has some particular advantages. Let us begin.
How to make metallic nails using powder

This technique is rather interesting and requires some good skills. Also, it will fit you, if you are not afraid of getting ‘dirty’ with nails painting. So, you will need these:
- Base nail coat;
- Some black nail polish;
- Top nail coat;
- Metallic pigment;
- Eyeshade applicator (you may also use a sponge or just your fingers).

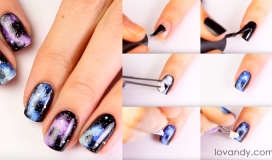
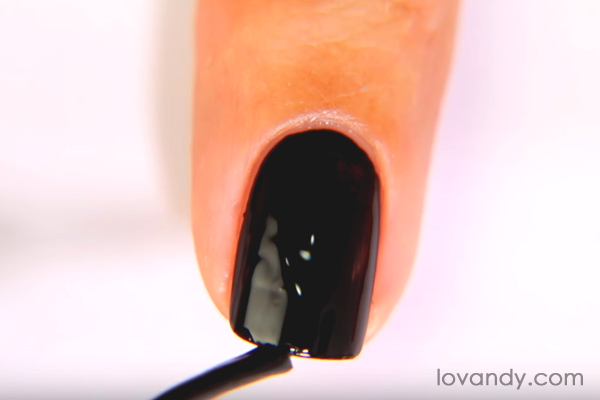
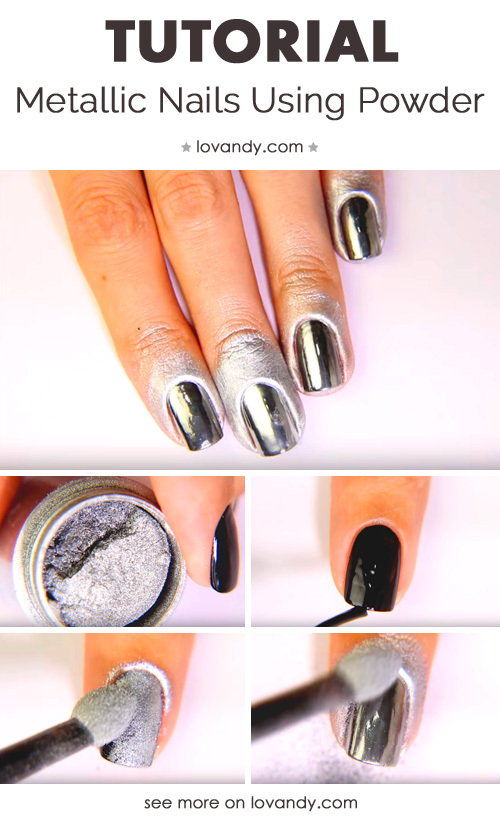
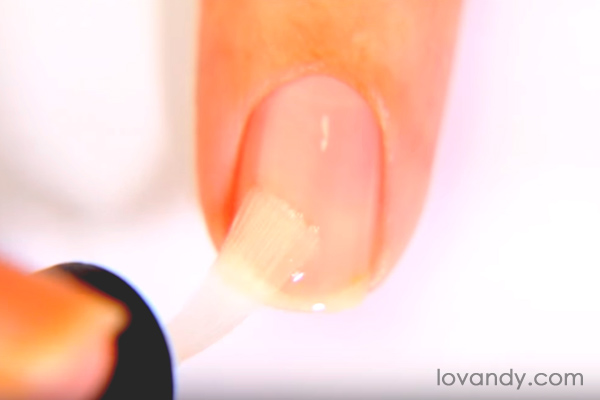
First of all, you should put some base coat on the nail. Then cover it with two layers of your black polish.
Now use a top coat to level surfaces. This way we ensure that metallic nails powder we are about to use will stick nicely to the nail.
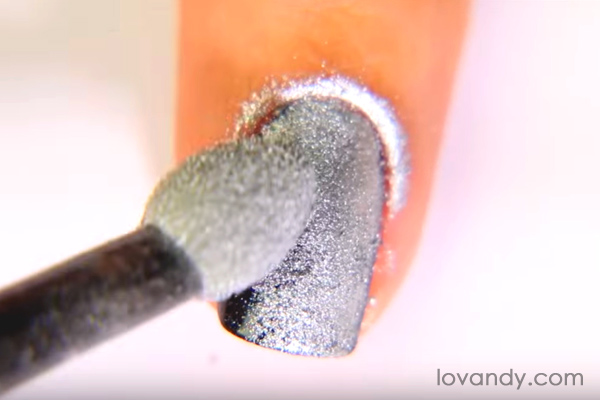
After your top coat has dried completely, use your eyeshade applicator (or whatever you have chosen) to put the metallic pigment on your nail. It is ok if some powder falls on your finger. We want some nice full layer of these sparkles.

Now pull the applicator towards the top of your nail. You need to rub it really good. The more moves you do, the better this manicure will look.
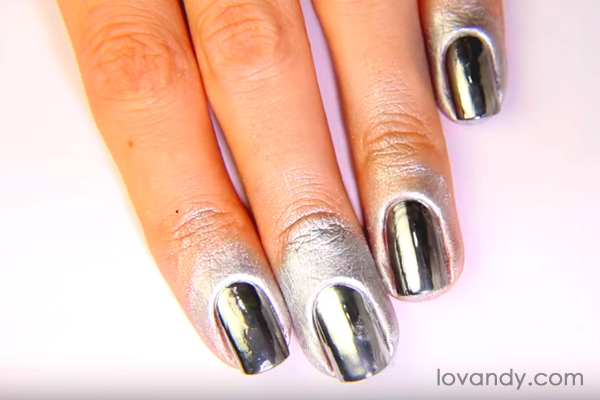
This first technique was one of the most difficult. However, the result is actually outstanding. Here is what you will have by the end. As you see (and probably feel), this metallic nails dust covers all fingers. Do not worry, as it will easily clean with acetone. IMPORTANT: do not use any top coat now; it can spoil the whole work.
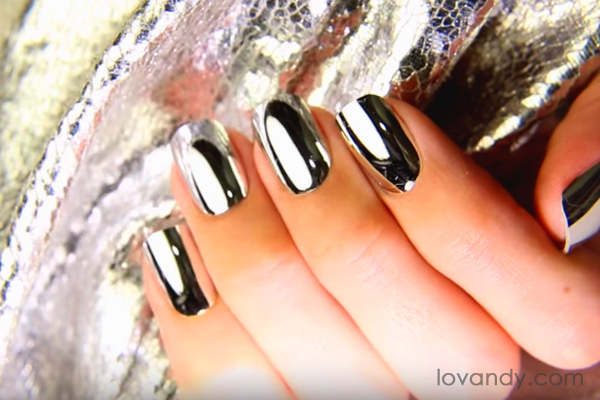
Using chrome mirror effect nail polish to make metallic manicure
This way of making manicure is a little easier to perform than the first one. You do not need some special skills or equipment to make it. You should only have these:
- Special base nail coat for metallic polishes;
- Metallic polish itself;
- Some top coat.
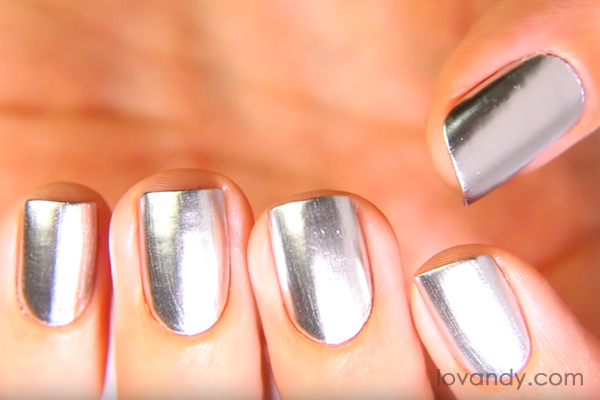
Firstly, cover your nails with this special coat. Notice that you need to jump to the next step immediately after that.

Use the chrome effect nail polish to paint your nail. You should do it quickly, but do not lose accuracy. Two layers should be just nice.

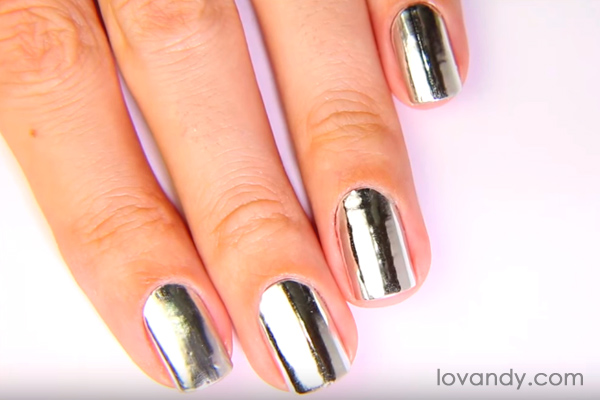
Cover your nails with a top coat. Basically, that is it. This metallic nail polish helps you make some manicure really fast. Nevertheless, this way of painting has some serious disadvantage. As you may see, the result is not as shiny as the first one was. Use this method when you want your nails painted in a short period of time.

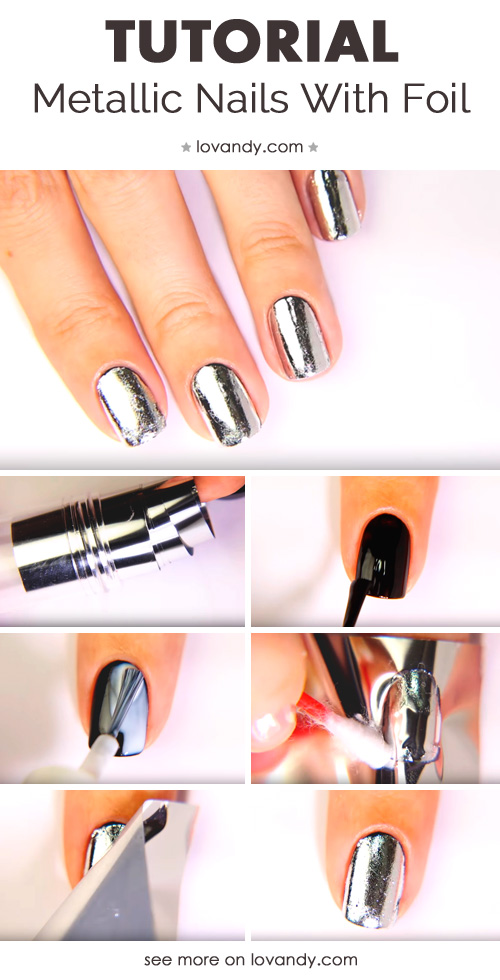
How to do metallic nails with foil

This manicure will not be that fast. In addition, you will need some more materials:
- Some foil for manicure;
- Base nail coat;
- Black nail polish;
- Special foil primer;
- Top coat for nails;
- Some stick or cotton bud for smoothing.

As we have done before, cover your nail with the base coat and paint it black two times.

Now grab this foil primer and cover the nail with it. One layer is enough. Then you will have to wait for about three minutes before it dries. It will become transparent, but remain sticky.

Now we will actually make metallic nails with aluminum foil. Take a piece of manicure foil and put it on your nail (matte side down). On this step, you need some really good precision. It would be best, if you could stick it smoothly with the first try. Unfortunately, it is not possible. To make the result better, use a cotton bud to smooth the foil.
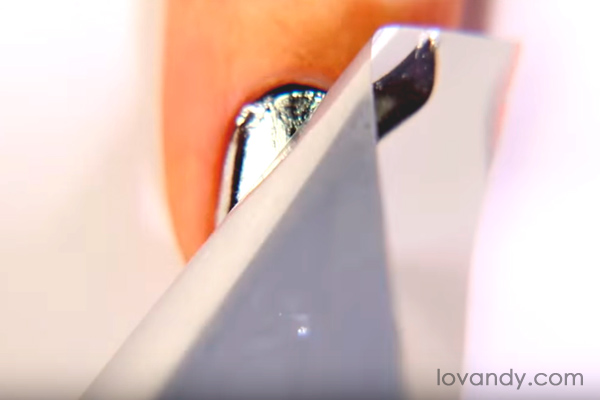
Remove the tape, and the metallic pigment from the foil will stick to the nail.

As you see, this coat has uneven structure. This is just the way it is. We will fix it a bit in the next step.
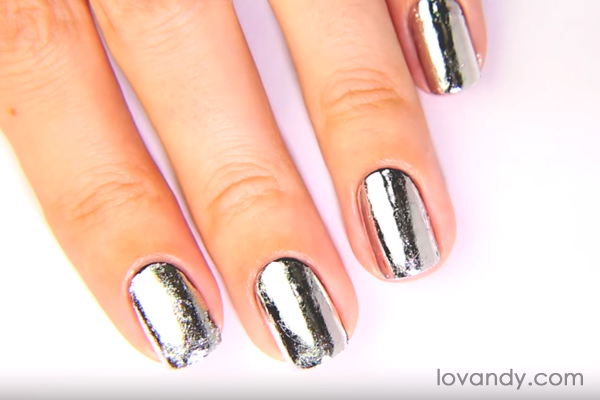
So, to make the whole look better, cover your nails with a top coat. If you do this, your nails will lose some shininess, but if you do not, the foil may fall off soon. This DIY metallic nails with aluminum foil requires some skills and precision. The more you do it, the better it becomes.
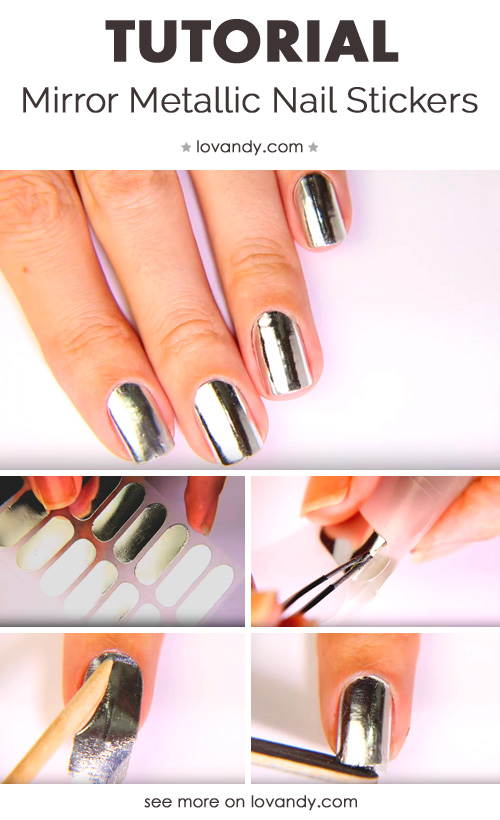
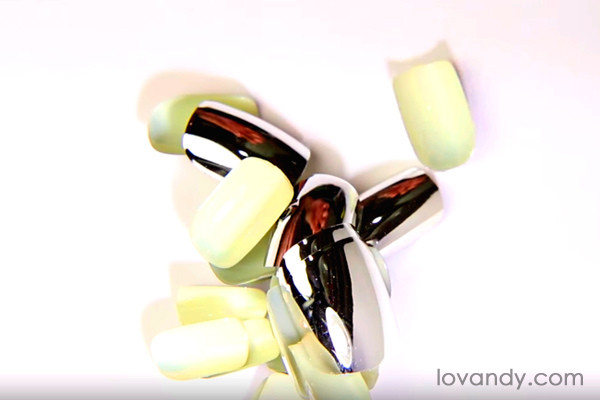
Making manicure with mirror metallic nail stickers

This method looks pretty similar to the previous one. However, it is somewhat easier. You will need this stuff to acquire it:
- Manicure tweezers;
- Metallic stickers for nails;
- Orange stick for manicuring;
- Nail file.

Using your tweezers, catch one of silver metallic nail stickers.

Neatly put it on the nail. Start from the bottom and then, using the orange stick, make it adhere.

Cut the excess of metallic nail polish stickers with your nail file. Notice that you do not have to use any top coat.
Therefore, the result looks beautiful and is easy to achieve. However, the disadvantages are somewhat serious. It is hard to remove those stickers, and your nails’ edges will remain sticky for a long time.
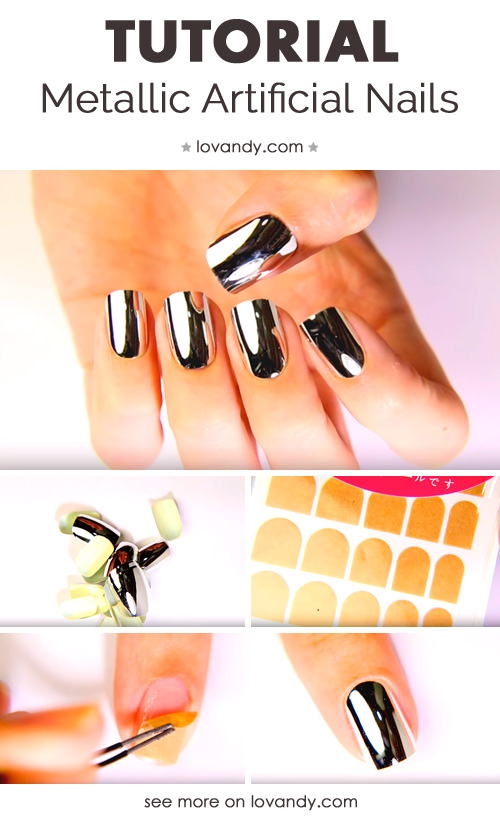
Making a manicure with metallic artificial nails
This last manicure method is a convenient one. You will be able to remove it whenever you want to. Also, it will not take long to make it. We need:
- Metallic fake nails;
- Special stickers for these nails;
- Tweezers;
- Orange stick if you want to remove it.

There are many different false nail stickers available on market. It comes in various sizes, by the way, so you may use anything you like.

Put your sticker on the nail. Be advised, that it is better to use one, which is a little smaller than the nail. Now remove the protective paper layer with tweezers.

Put your metallic false nails on stickers carefully (use tweezers if you need). You can easily remove one with the orange stick. If you want to, just pry it by one side.

There you go. It may be the fastest way of metallic manicure. In addition, it looks rather shiny and beautiful. The problem, which you may face, is loosening of false nails. This means you have to be accurate when gluing it.
All of these metallic effect nails tutorials have their own advantages and disadvantages. Ones are easy to make, while the others are a lot more difficult. Some of them have an awesome brilliance, and the others may be dimmer. Anyway, it is up to you to decide, which one is your own very best. Tell us about it, if you have an absolute leader.
Find out more design ideas:
Source of pictures: youtube.com