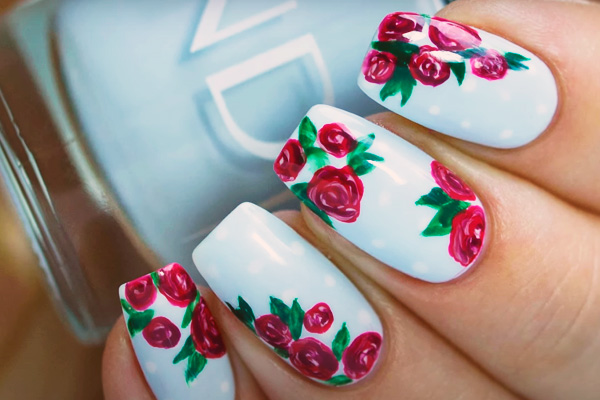
Every woman loves flowers, especially if talking about lush, luxurious roses of a bright scarlet color, symbolizing deep love and passion. How can one remain indifferent when looking at this magnificence rose nails design?
In general, flower-themed nail art is being one of the main trends for many years. Thus, with this white nail art with light red roses you will be up to the trend.
To begin with the nail art, apply a base coat, followed by a polish of the main shade. Red or pink roses will look gorgeous on a white or milky coating, so we propose to take one of these colors as a basis. Cover the nail plates tightly with it in two layers and fix it in the lamp.

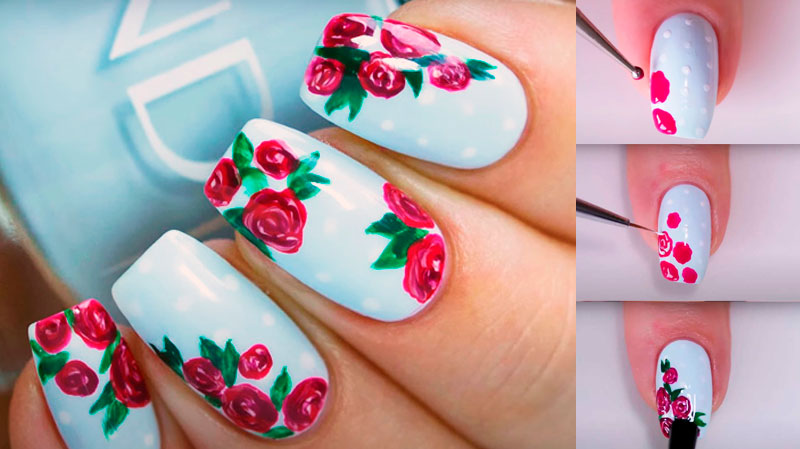
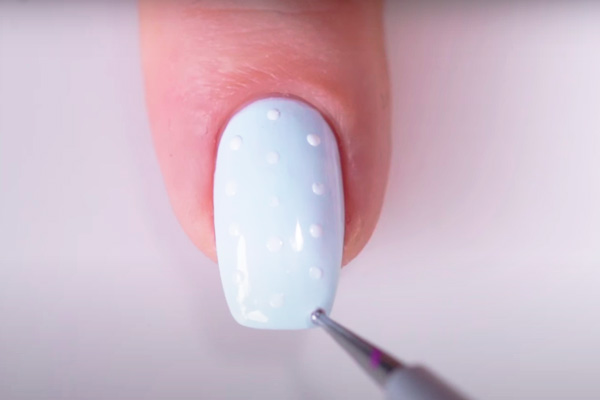
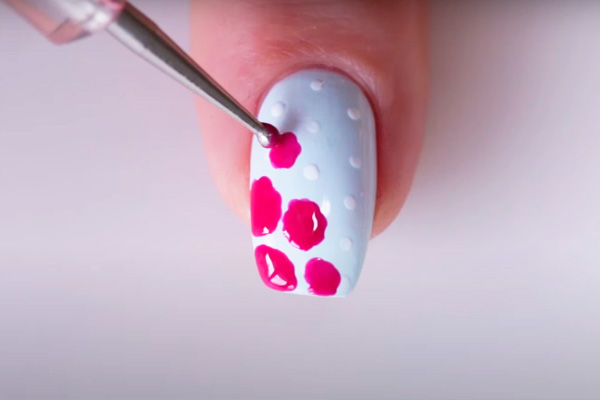
Using a dot, make small dots of the same polish to the nail plate where the drawing will be located. Roses can be a small accent on one finger or tightly distributed on all nails.
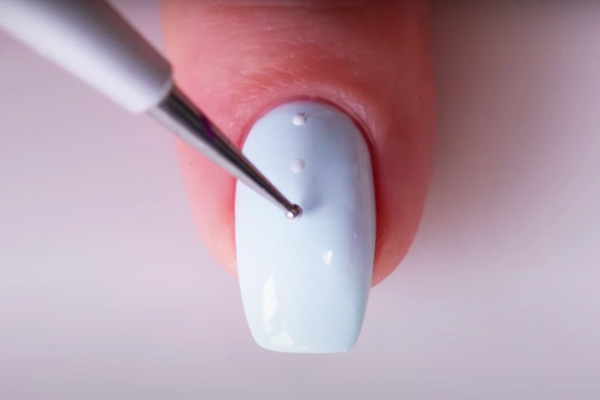
Dots-droplets are placed in vertical lines at the same distance from each other as in the picture. They will serve not only as a nice addition to the design, but also as a kind of markup for our drawing.
Let’s move to the most interesting part – drawing roses. For this, we will use dots and scarlet, crimson or red acrylic or gel paint. Put a drop of polish on the nail plate and roll it out, pulling out small round petals. This way you will get a blot resembling a rosebud.
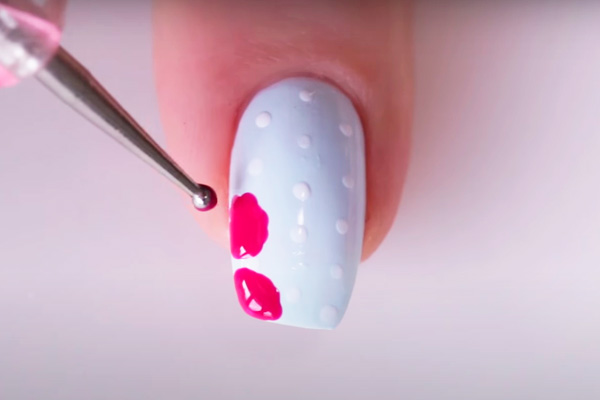
This way, we draw five bases for buds. You can mentally divide the nail plate diagonally and draw in one of the resulting triangles – it will turn out very beautifully.
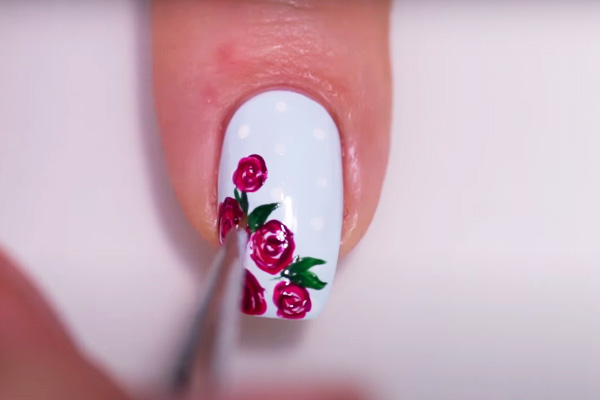
Next, draw small arched lines with white gel paint using a thin brush inside each bud, indicating the edges of the petals.
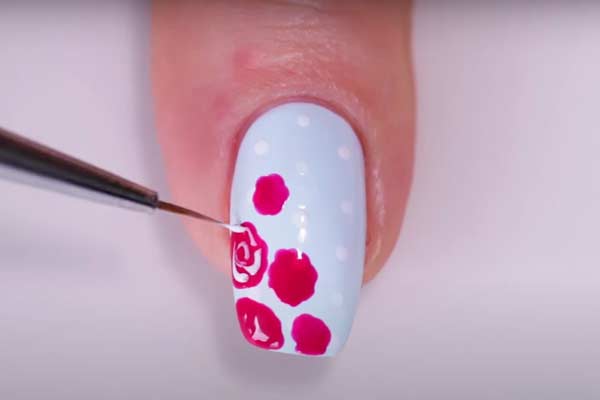
Work on all five flowers in the same manner. Moderate negligence will only play into the hands – so the roses will turn out to be more natural.
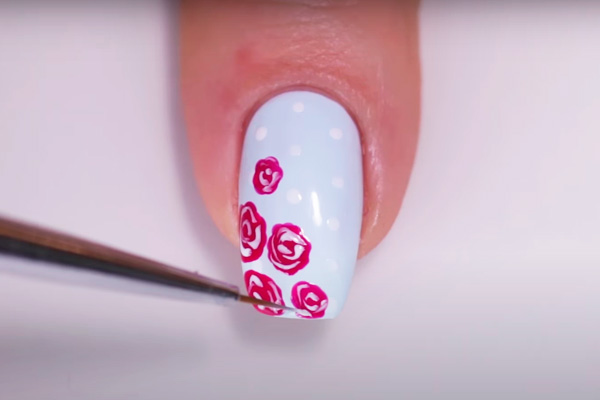
Without drying the white lines, draw thin strokes with a darker paint shade over white lines. After it is done, carefully draw green leaves around the buds.
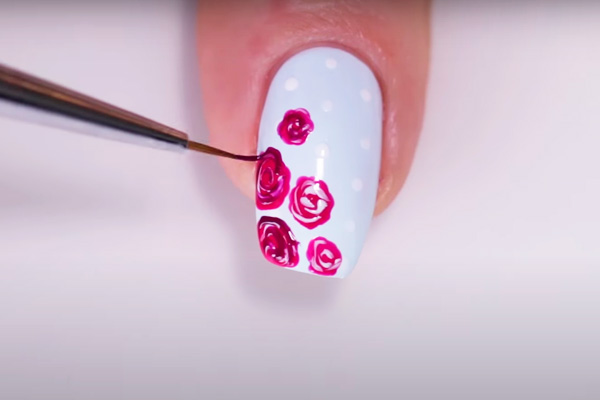
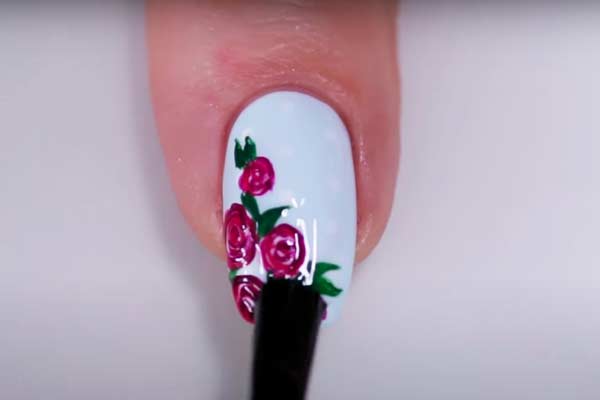
The thinnest brush is again useful for this. Dry the resulting rose nail art in a lamp and fix it with a glossy top. By the way, on such a manicure a matte finish will look especially beneficial.
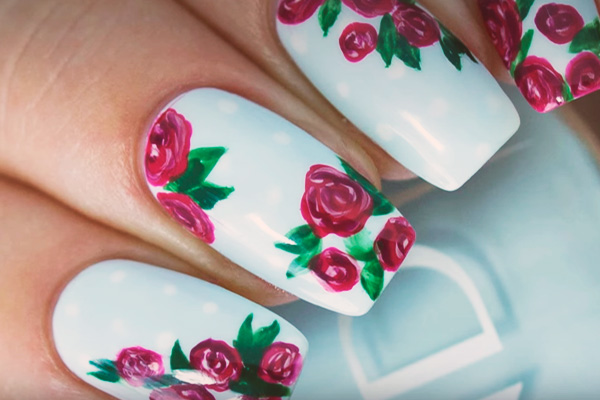
Using the same idea, repeat the drawing or its smaller elements on the rest of the nails. You can try to place roses in different ways: in the corner of the nail plate, from below along the overgrown part of long nails, or from above under the cuticle.
The nail art will look luxurious in any case. Finally, your perfect white-pink rose nails are ready. Enjoy!
Sweet and Beautiful Rose Nails Art Step by Step
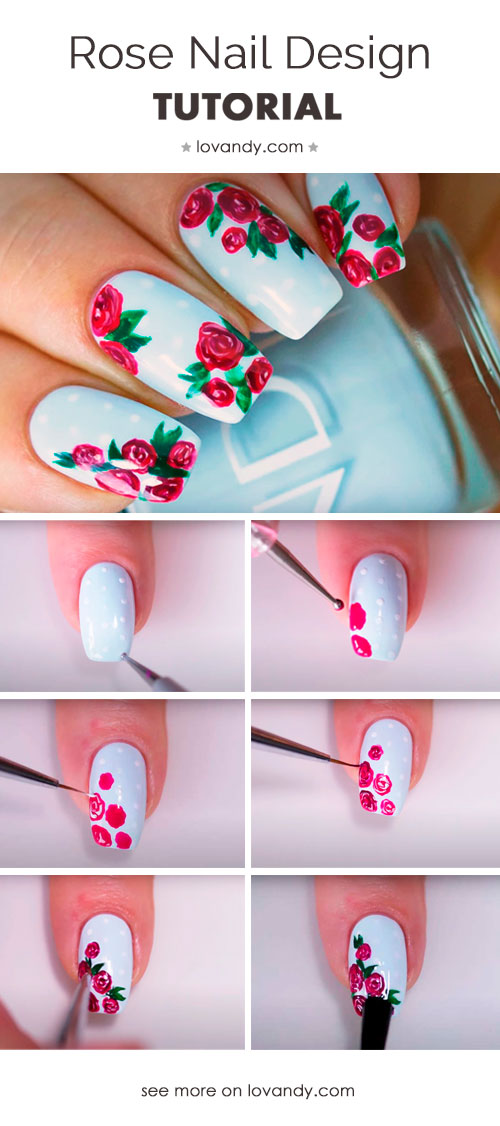
source of pictures: youtube.com