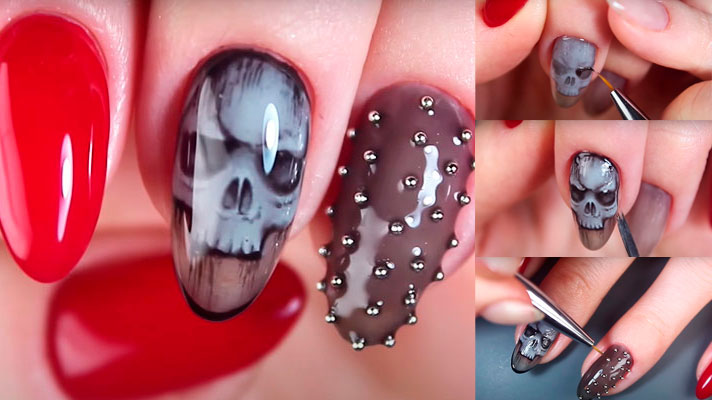
If you want to add some boldness and rebelliousness to your appearance, it is time to try this gothic style nail design with a skull. Ghostly skull art, contrasting colors and broths as a reference to thorns – Let’s Rock!

What we need for creating this simple red-black nail art is:
- top and base nail coats;
- classic red and semi-transparent black polishes;
- Black polish or acrylic paint;
- A thin and a flat brush of normal size.
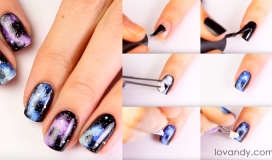
First, cover all nails with a base coat and let it dry. Keeping in mind that the main art will be created on the middle and ring fingernails, cover them with a semi-transparent black polish, while the rest three nails – with a red one. If you don’t have a semi-transparent black polish, you can simply mix black polish with a base coat, or with a transparent polish.

Let us start drawing the skull on the middle finger. First, mix the black gradient with white polish on a palette or any piece of plastic. This way you will get a translucent light gray shade – it will be the basis of the picture.

Take a thin brush and draw out the outlines of a human skull. After it got dried, start fill in the drawing. Use a semi-transparent black and thin brush again.

Sketch the eye sockets, nose, slightly outline the cheekbones and upper jaw, slightly shade the hollows on the skull above the eyes. Dry the drawing.

Add more clarity to the drawing with black polish, adding lines over the eyes, nose, cheekbones, jaw, and also the shadows on the top of the skull.

Dry the resulting drawing. Our grim skull, a central element of the gothic black nail design, is almost ready.
To add more relief to the skull, add some white-gray lines on the bulges of the skull using a thin brush. Then, trace the outline of the skull with black paint and dry the nail thoroughly.

For blurry smudges, take a dry flat brush, and apply a drop of black paint to the spots from which the smudges will come, and smear it by brushing down. Finally, dry the nail, apply the top coat, and dry the resulting art piece.

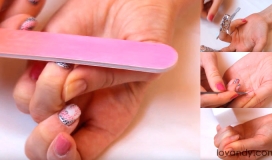
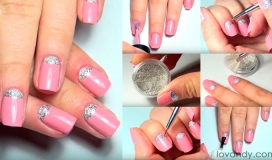
To create a design on the ring finger, we will need silver broths that will act as thorns. Cover the blackish nail plate with a top and spread the broths tightly enough. Apply another layer of the top coat and dry it thoroughly.

Cover red nails with additional layer of the red polish if needed, as well as with the topcoat. So, bright and cute goth girl nails are ready.

Such a design will become a bold protest to the everyday routine and will demonstrate the real rebellious spirit of its owner!
Cool and Easy Gothic Nail Art Step by Step

source of pictures: youtube.com